

Accessibility: How To Caption
There are many ways to caption videos depending on how your final user will be interacting with your video and where your video will uploaded to. Below you will find step by step instructions on how to use the following software and platforms to caption all videos here at the University of Virginia.
- Auto Captioning
- Vimeo
- Facebook Download Captions
- YouTube
- Adobe Premiere
Basics of Captioning
When you are captioning you will want to do the following:
- Should be the exact words that are spoken excluding ums and stuttering (unscripted content)
- Should be the exact words that are spoken including ums and stuttering (scripted content)
- Important background sounds should be conveyed in the captions in brackets or parentheses
- Use italics to convey speech that is spoken off screen
- Use proper punctuation to convey meaning and to emphasize certain speech when needed.
- Do not reveal information that was intentionally excluded from the language
- Music: should include the title and the artist
- Exception when the music is setting a mood
- Example: [SPOOKY MUSIC]
- Exception when the music is setting a mood
- Music: If the lyrics are important you must include them in the captions
- If you cannot make out what is being said notify the user of such using plain language
- Example: (Inaudible whispers)
- If there is cursing you need to remove it from the captions and replace it with a designated word such as BLEEP
- Notify the user when words are whispered or mouthed
- Example:
- Whispered:
- (Whispered):
- Example:
- Describe sounds that are in the audio in terms of the sounds themselves not what is causing the sound
- When someone is speaking you must identify them at the beginning of them speaking
- Example: [BROOKE] or [Brooke]
Auto Captioning
If you have a YouTube or Vimeo account, you can have these platforms auto caption the video for you and then you can go through and review the captions and make any changes that you need. We recommend using YouTube for this as it allows you to have more control over the timing of the captions after auto captioning has occurred. Once Captions are complete you can download the video with Captions or link directly to your newly captioned video.
User Impact
Auto captioning can help to speed up the captioning process to provide access to the video more quickly than manually creating the captions, but a manual review will need to be completed so that the captions are accurate and complete.
Vimeo
Login to Vimeo and go to the video you wish to add/edit captions of
Click Close Caption icon on Right hand side of the screen.

Click Transcript

Click Edit Icon (pencil to right of search bar).

Edit captions by clicking in the corresponding caption fields

Click Save
Captions are updated on the video!
Note: Vimeo does not allow you to change the timing of captions. To change the caption timing, you will need to upload a new SRT file to the video. To upload new captions, follow the below steps.
Login to Vimeo and go to the video you wish to add/edit captions of
Click Close Caption icon on Right hand side of the screen.
Click plus icon next to My Uploads.
Upload new file.
Captions are saved to video.
Click three dots and click Edit Video
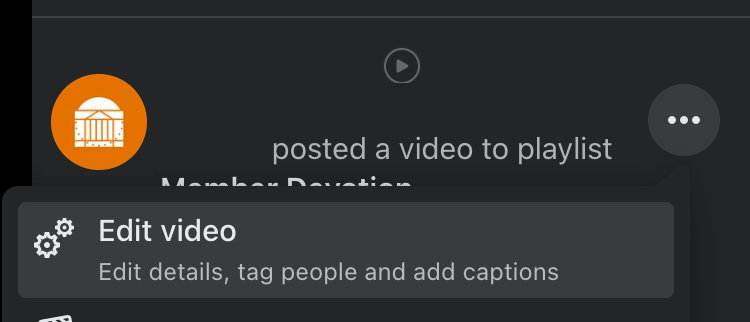
Click Video options

Turn on Auto-generate captions or upload your own caption files

Facebook Download Captions
To Download current captions on a Facebook video that you do not own following the following steps.
Go to the Facebook video you want to get the caption file for
Inspect the page
Click Network in the inspect options
Start playing the video (if video is already playing make sure you refresh the page to see all the files)

In the filter field type srt

Right click on the file that is filtered to and right click open in new tab.
Right click on new tab and save the page as a .srt file
YouTube
Login to your YouTube account
Go to your video you want to modify captions on.
Click the pencil icon to edit

Click Subtitles on the left side of the screen

Click Edit on the captions you want to edit

Edit them as needed
Note you can click the + sign to add more text/extra timings and you can modify the timing on by changing it in the right column.

Click save as draft or Publish to save your captions

Adobe Premiere
Pull up your project in Adobe Premiere
Open the Captions Pain
File > New > Captions
In the main navigation click Sequence > Captions > Add new caption Track

Format should be Subtitle
This allows the user to turn the captions on and off as they need.

Click Okay
Click the three dots in the Caption pain and click Add new captions segment

Type your text
Adjust the length/timing of the caption text in the time timeline panel like you would for normal content.
Move the timeline indicator and repeat steps 6-8 until your video is fully captioned.
Once finish export your video as follows
File > Export > Media
Choose Video export settings that you want
Under Captions select “Create Sidecar File”
Burn Captions into Video will prevent the captions from being turned off and should only be used for platforms that do not offer native captioning.
Click Export in right hand corner and wait for file to be completed.
Two files should be downloaded (your video and your srt caption file)
